Introduction
Hello Everyone, In this post, I am going to tell you about the top 10 features of Amazon Transcribe that you must know to fully utilize the power of this Machine Learning service. I hope you are excited to know about them, So, Without wasting any time, Let’s get started!
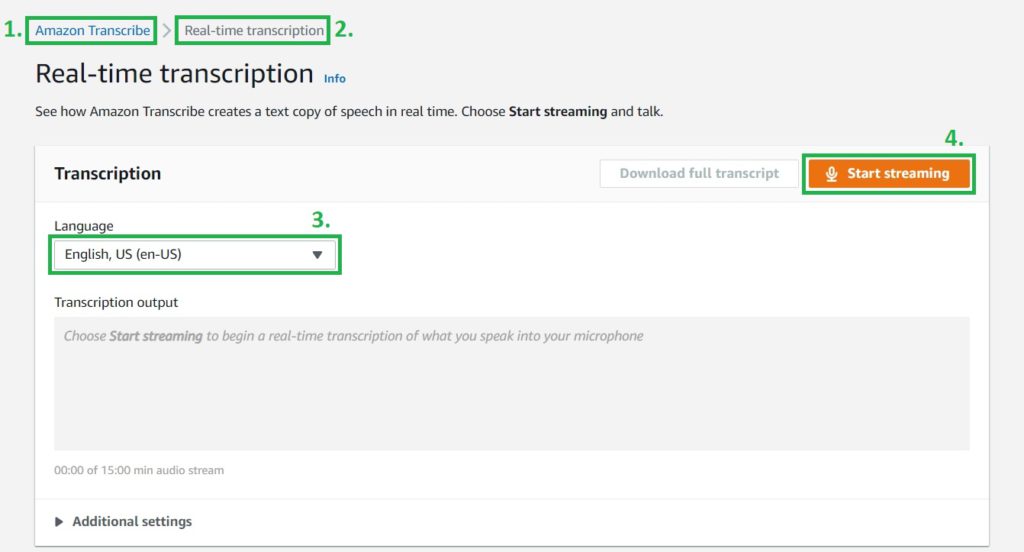
Real-time Transcription
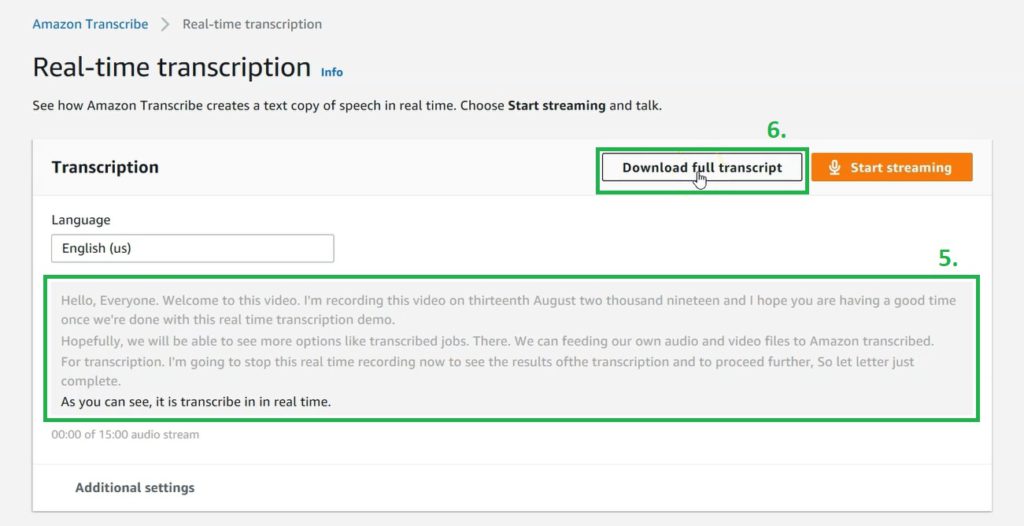
With this feature you can generate transcription for your speech in real-time, you just need to click on Start Streaming button and start speaking to your microphone, Amazon Transcribe will show you the transcribed text live on screen.
This feature is useful for generating subtitle information for a live video or an online meeting.
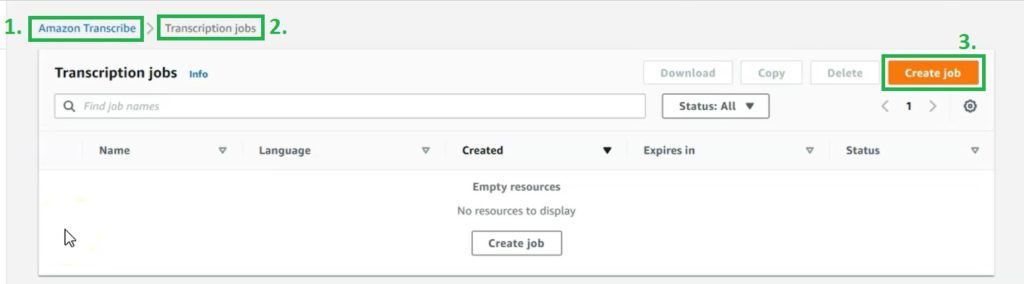
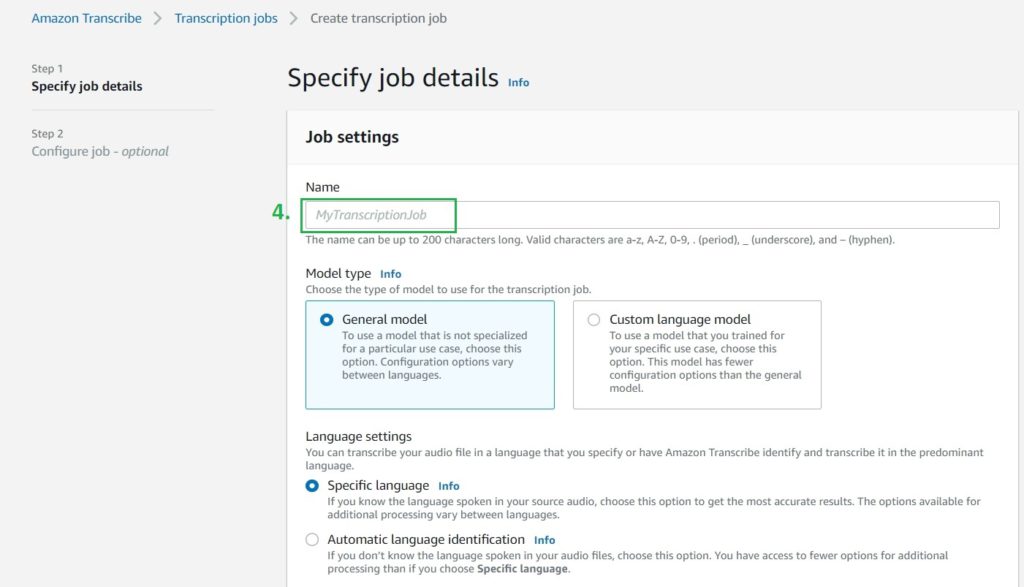
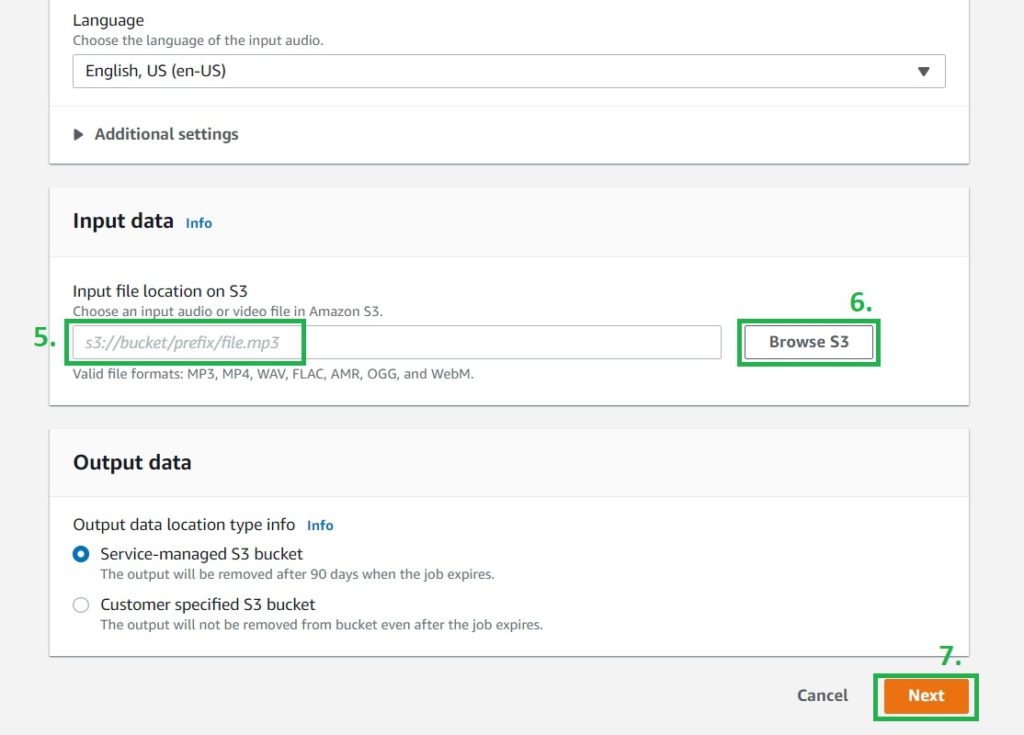
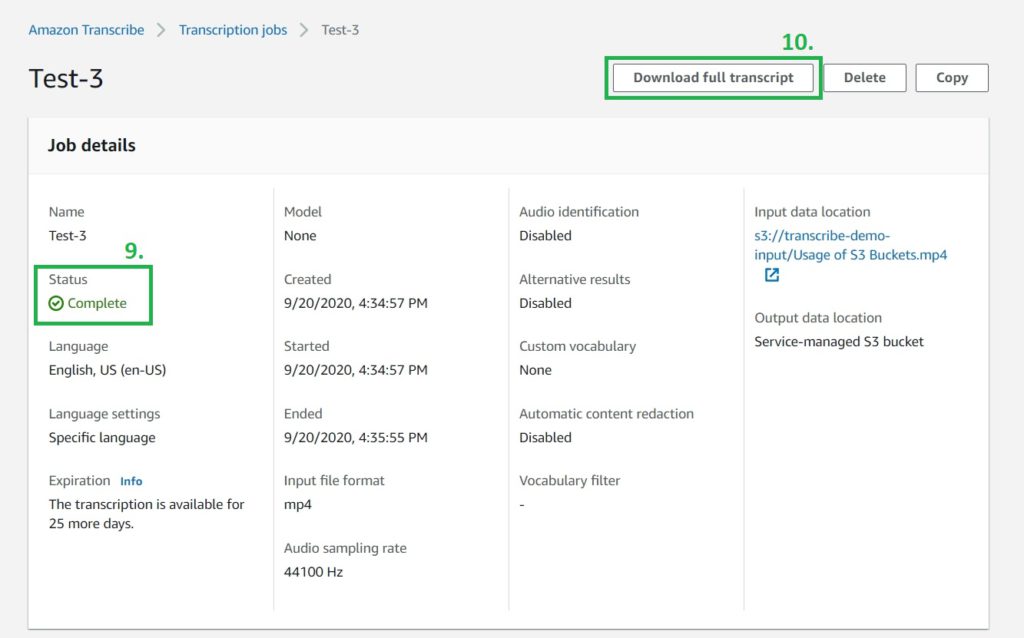
Transcription Job
This is one of the prime features of Amazon Transcribe for doing batch processing of multiple media files simultaneously. You can define a Transcription Job by selecting multiple parameters to get the desired text output. This option helps in automatically transcribing hundreds of audio files at the same time.
Useful in auto transcribing a video course, a series of podcasts, or any type of audio content in bulk form with minimum efforts.
Automatic Language Detection
With this feature Amazon Transcribe can automatically detect the language of your input media file. So that you don’t have to specify the language for each file manually.
This feature is useful when you want to auto transcribe multiple media files of various languages all together.
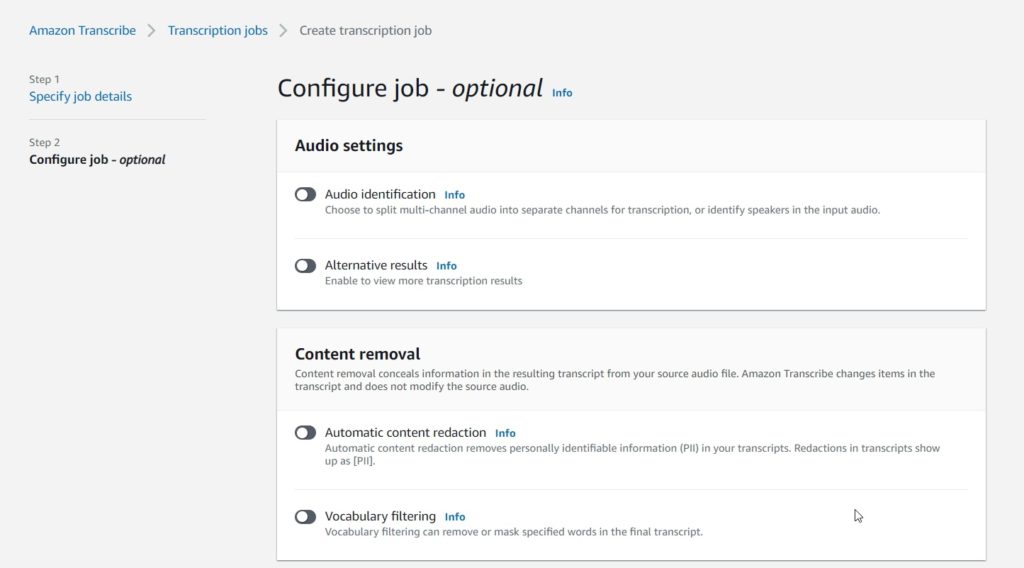
Channel Identification
If your audio input file has Voices on multiple channels then you can use Channel Identification feature of Amazon Transcribe. With this feature, Amazon Transcribe will automatically identify the voices on each channel and will generate the transcripts for them. The transcription output will be having a combined text for the whole of the recording and also the separate text corresponding to each channel.
Very useful in the scenario where customer and support agent voices are recorded on separate channels.
Speaker Identification
This feature helps in identifying multiple speakers in an audio file, So if you want to auto transcribe a media file that is having multiple speakers talking in it then you can use this speaker identification feature of Amazon Transcribe. The output will be having the whole text and the separate texts corresponding to each speaker in the media file. You can choose to identify up to 10 speakers in an audio file.
This feature can be used to auto transcribe a conference call where multiple participants were involved.
Custom Vocabulary
With this feature, you can provide a list of specific words that you want Amazon Transcribe to recognize in your audio input. These are generally domain-specific words and phrases, words that Amazon Transcribe isn’t recognizing, or proper nouns. You can have up to 100 vocabularies in your account, the size limit for a Custom Vocabulary is 50Kb. You can have it defined in either a list format or a table format.
This feature can be used to help Amazon Transcribe understand and place industry-specific terms correctly in the transcription output, like one of these AWS service names EC2, S3, RDS etc.
Vocabulary Filtering
This feature helps in masking or completely removing profane words automatically in the transcription output. You can choose to mask in-appropriate words with three asterisks *** or remove them completely, by defining the vocabulary filter for unwanted words or terms.
Very useful in masking or removing offensive terms while generating subtitles for a family based video or show.
Automatic Content Redaction
This feature automatically redacts sensitive personally identifiable information also known as PII, like the name of a person, his bank account number, credit card info, etc. from the transcription results and replaces those parts with the text PII.
It is very useful for meeting Security and Compliance requirements. Because by using this feature you can protect your Customer’s sensitive information.
Alternative Results
With this feature, we can request Amazon Transcribe to give us the alternate transcription results even with somewhat low confidence scores while transcribing a media file, by default it only gives us the transcription results that have the highest confidence level to deliver the high accuracy. We can request maximum 10 alternative results in the transcription output.
It is useful while doing the manual review of transcription results to choose the most appropriate transcription results.
Job Queuing
This feature is helpful in submitting a large number of transcription jobs to Amazon Transcribe, there is a limit of running 100 transcription jobs simultaneously and if you want to run more than this number then you can submit the transcription jobs using Job Queuing, this will put additional transcription jobs in the queue and will process them as soon as the slot becomes available, by default there are 100 slots for transcription jobs, which means you can submit up to 10,000 jobs to the queue.
This feature is useful in submitting a large number of transcription jobs to auto transcribe 1000s of files.
Conclusion
So, That was all about the Top 10 features of Amazon Transcribe that makes this service very powerful. If you are interested in learning them further then you can explore one of my courses at Udemy.com
Thank you for going through this post and giving me an opportunity to share this valuable information with you.
Let me know in the comments which feature out of these Top 10 features of Amazon Transcribe you liked the most?